

Table of Contents
- Best Drawer Dividers for Kitchen Utensils: What Actually Matters
- How to Organize Kitchen Utensils in a Drawer
- Adjustable Drawer Dividers vs. Fixed Inserts
- Silverware Drawer Organizer: Cutlery and Utensil Storage
- DIY Kitchen Drawer Dividers That Hold Up
- Cleaning, Maintenance, and Food-Contact Considerations
- Frequently Asked Questions
Last Updated: October 12, 2026
Best Drawer Dividers for Kitchen Utensils: What Actually Matters
The best drawer dividers for kitchen utensils are the ones that fit your actual drawer, hold up to daily use, and match how you cook.
Most drawer organizers fail for boring reasons. The drawer is an odd width. The dividers slide when the drawer opens. The compartments are too shallow for a ladle. Get those three things right and the rest is easy.
Below, we'll walk through materials, how to measure properly, and how to divide a drawer so it stays organized past the first week.
Materials: Bamboo, Wood, Plastic, and Metal Mesh
Bamboo and wood inserts look warm and hold weight well, which matters if you store cast-iron tools or a heavy masher. Bamboo handles moisture better than untreated wood, but neither should sit wet. Wipe them dry before reloading.
Plastic dividers are the practical default. They're light, wipe clean in seconds, and cost less. The trade-off is flex: thin plastic bows under a full load of knives. Look for rigid PET or ABS rather than flimsy styrene.
Metal mesh trays drain well if you wash utensils in place, but they scratch nonstick pans and rattle in a shallow drawer.
| Material | Best For | Watch Out For |
|---|---|---|
| Bamboo | Heavy tools, visible drawers | Swelling if left damp |
| Solid wood | Long-term durability | Higher cost, needs oiling |
| PET plastic | Everyday cutlery, easy cleaning | Flexes if thin-walled |
| Metal mesh | Drainage, modern kitchens | Noise, scratches |
A quick note on food contact: utensils go from drawer to food, so organizers should be smooth, non-porous, and easy to wipe. Porous wood can trap crumbs and grease over time.
How to Measure a Kitchen Drawer for an Organizer
Measure the inside of the drawer, not the cabinet front. Width, depth, and height, in that order.
- Width: Measure between the interior side walls at the front and again at the back. Drawers are rarely perfectly square, so use the smaller number.
- Depth: Measure front to back, inside. Leave 2 cm of clearance if the drawer has slides or a soft-close mechanism that eats space at the back.
- Height: Measure from the drawer floor to the underside of the cabinet rail. A tall utensil like a whisk or ladle needs 8-10 cm of clearance to sit upright.
Watch for irregular interiors. Some drawers taper at the back, and some have a raised lip where the base meets the sides. An expandable organizer handles a tapering drawer far better than a rigid insert, because you can adjust the width to the narrowest point and let the dividers take up the slack.
How to Organize Kitchen Utensils in a Drawer
Start by emptying the drawer completely and sorting everything into three piles: daily use, occasional use, and duplicates. Most crowded drawers are crowded because three spatulas are doing the job of one.
Then group by function, not by shape. Spatulas, spoons, and ladles belong together because you reach for them in the same moment. Whisks and measuring spoons belong together for the same reason.
- Empty the drawer and wipe it out.
- Sort into daily, occasional, and duplicate piles.
- Move duplicates to a donation box or a backup drawer.
- Group what's left by cooking task.
- Place the organizer and assign one group per section.
- Load the heaviest items closest to the drawer front so the drawer doesn't feel back-heavy.
Dividing Drawers Into Functional Sections
A drawer divided into functional sections stays tidy longer than one divided by utensil type alone. The reason is simple: you organize around a task, so the drawer matches your movements instead of fighting them.
For a standard 60-70 cm wide drawer, three sections work well: a cutlery section for forks, knives, and spoons; a cooking section for spatulas and spoons; and a utility section for peelers, openers, and small tools. If your drawer is narrower, drop to two sections and move the utility items elsewhere.
Adjustable dividers make this easy. You set the width, then move the internal panels to match the size of each group. A fixed insert locks you into whatever layout the manufacturer decided on.
Adjustable Drawer Dividers vs. Fixed Inserts
Adjustable dividers win for most kitchens, but the reason is more specific than flexibility. It comes down to three things you can actually test: how well the frame grips the drawer, how much weight the dividers carry before they bow, and how many utensils each compartment holds without spilling over.
Stability: What to Check Before You Trust a Divider
A divider that shifts when the drawer opens is the most common failure. Two mechanisms prevent it:
- Tension or spring-loaded ends that press against the drawer walls. These hold best in drawers with smooth, parallel sides.
- Adhesive or rubberized feet on the base. These resist sliding but lose grip on textured or dusty drawer bottoms.
A quick test: set the organizer in place, load it, then open and close the drawer ten times at normal speed. If the frame walks even a quarter inch, it will drift over a month of daily use.
Capacity: How Many Utensils Fit
Capacity depends on compartment width, not overall tray size. As a rough guide:
- A 2-inch-wide compartment holds a single stack of flatware, roughly 10 to 15 pieces.
- A 3-inch-wide compartment fits bulkier cooking tools like spatulas and serving spoons, around 6 to 10 pieces.
- A 4-inch or wider compartment handles ladles, whisks, and tongs without crowding.
Overloading a compartment is what causes dividers to bow and trays to crack. Leave about a quarter inch of slack at the top of each section.
Transparent Value Comparison
When comparing options, line up the same four columns for every product:
Expandable Drawer Organizer – Adjustable Cutlery Tray for Spoons & Forks →
| Factor | What to Look For |
|---|---|
| Price | Compare per usable compartment, not per tray |
| Dimensions | Exterior width vs. usable compartment width |
| Adjustability | Range in inches, and whether dividers move or are fixed |
| Warranty | Length and what it covers (frame vs. dividers) |
A cheaper tray with more usable compartments often beats a pricier one with thick frame walls that eat space.
Where fixed inserts still make sense is a drawer you'll never change, in a kitchen you plan to keep for years. Even then, check the fit against your actual measurements rather than the drawer's nominal size.
The U.S. Consumer Product Safety Commission guidance on household product safety is worth a look if you're buying organizers for a home with young children, since drawer contents and hardware can present tip-over and access risks.
Here's how we'd choose:
- Odd or tapering drawer: expandable divider, adjusted to the narrowest point.
- Standard rectangular drawer: either works, but adjustable gives you room to change your mind.
- Very shallow drawer: a low-profile tray or sliding panel, not a tall insert.
- Deep drawer: stackable organizers or a two-tier layout.
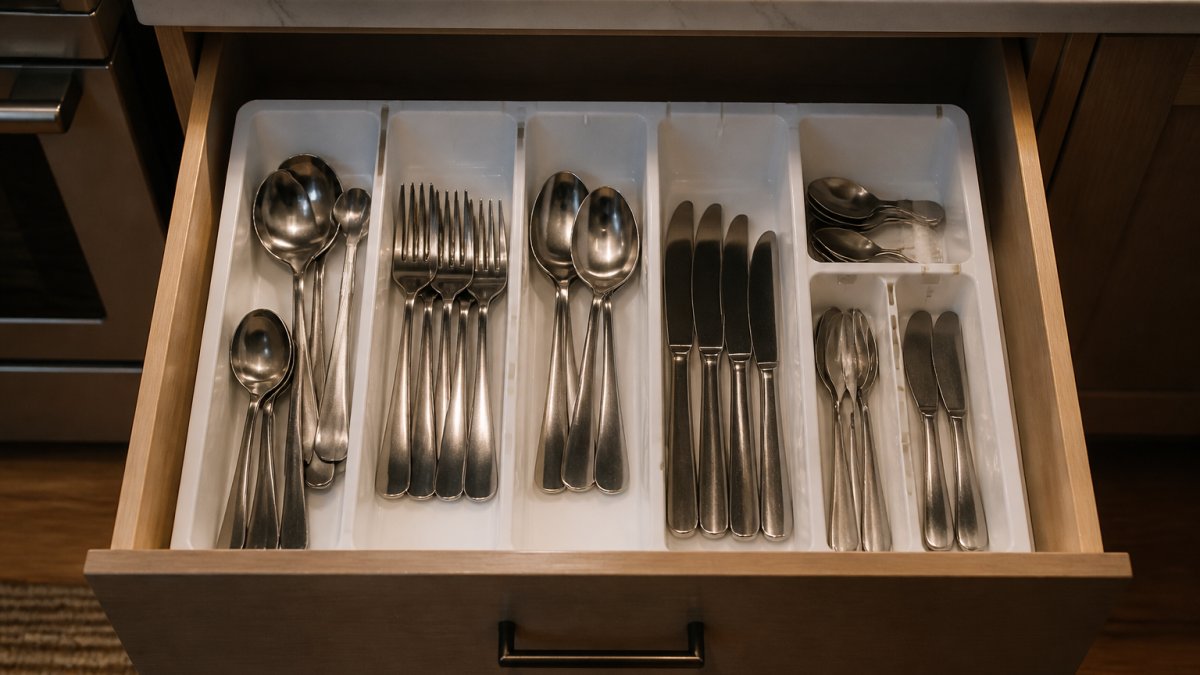
Our own pick for a standard kitchen drawer is the Expandable Drawer Organizer from The Reset Aisle. It's made from PET plastic, expands to fit a range of drawer sizes, and lets you reposition the removable dividers to match your own layout.

Silverware Drawer Organizer: Cutlery and Utensil Storage
A silverware drawer organizer is a tray with defined compartments sized for forks, knives, and spoons. The best ones keep each utensil type separate so you can grab one without raking through the pile.
Compartment count matters more than most buyers expect. Too few and everything mixes. Too many and you end up with empty slots while the knives overflow.
For deeper drawers, a stackable organizer or a sliding tray adds a second layer without losing access to the bottom. Keep the most-used cutlery on the top layer and serving pieces below.
Cleaning is straightforward: wipe with a damp cloth, dry thoroughly, and put it back. Avoid soaking wooden inserts, and check that the organizer sits flat before you load it, since a rocking tray will spill its contents every time the drawer moves.
DIY Kitchen Drawer Dividers That Hold Up
DIY dividers can work well if you build for stability rather than speed. The failure mode is always the same: a divider that shifts when the drawer opens.
What holds up:
- Cut-to-size acrylic or PET panels with adhesive dots on the base to stop sliding.
- Wood strips screwed or glued into a frame, sized to the drawer's interior.
- Spring-loaded tension dividers for wide, shallow drawers, as long as the tension is firm.
What doesn't: cardboard, loose plastic strips, and anything held in place by friction alone in a drawer that gets opened twenty times a day.
If you're weighing DIY against buying, DIY makes more sense for an oddly shaped drawer no standard organizer will fit.
Cleaning, Maintenance, and Food-Contact Considerations
Clean your drawer organizer monthly, or weekly if you cook daily. Crumbs and grease build up faster than people expect, and a greasy compartment makes every utensil in it feel dirty.
- Wipe plastic and metal with a damp cloth and mild soap.
- Dry completely before reloading, especially wood and bamboo.
- Check divider tabs and adhesive dots every few months for wear.
- Re-sort the drawer twice a year and pull out anything you haven't used.
On food contact, the practical rule is that anything touching your utensils should be smooth, non-porous, and easy to sanitize. The USDA Food Safety and Inspection Service guidance on kitchen cleanliness covers the broader principles of keeping food-contact surfaces clean, which apply to drawer interiors as much as countertops.
For households with limited reach or grip strength, a lower drawer with a sliding tray is easier to manage than a deep one. Accessibility isn't an afterthought here; it's part of choosing the right layout.
Frequently Asked Questions
How should utensils be organized in a drawer?
Group by function and frequency. Put everyday items like spoons, forks, and knives in front compartments, and tuck less-used tools toward the back. Use an expandable organizer or adjustable dividers to create sections that match your actual utensil mix rather than forcing tools into preset slots. Keep long items in a wider compartment so they lay flat. Aim for one layer only; stacking utensils makes the drawer hard to open and close.
Are adjustable drawer dividers better than fixed organizers?
Adjustable dividers win when your drawer is an unusual size or your utensil collection changes. They expand to fill the width and let you move or remove panels as needed. Fixed organizers are sturdier and usually cheaper, but they leave gaps if the drawer is not a standard size. Measure your drawer first, then pick adjustable if your width falls between common sizes.
How do you keep drawer dividers from sliding around?
Start with a clean, dry drawer. Apply adhesive dots or rubber feet to the bottom of the divider, or line the drawer with a non-slip mat before placing the organizer. Spring-loaded dividers grip the sides of the drawer, so extend them until they press firmly against both walls. If the drawer has a slick finish, a thin rubber shelf liner under the divider prevents drifting without any permanent adhesive.
What is the best thing to line kitchen drawers with?
A washable, non-slip liner works best under drawer dividers. Look for a liner that grips both the drawer bottom and the organizer so nothing shifts when you pull the drawer open. Avoid adhesive-backed paper if you plan to rearrange; it leaves residue and tears. A smooth, wipeable surface also makes crumbs easy to remove, which matters in a drawer that holds cooking utensils used near food.
A disorganized utensil drawer costs you a few seconds every time you cook, and those seconds add up to real daily friction. The fix isn't more willpower; it's an organizer sized to your drawer and your cooking habits. The Reset Aisle builds its range around exactly that idea, with space-saving storage that keeps drawers neat and puts control back in your hands. Start with the expandable organizer, measure once, and let the layout do the work. Start Your Reset.