

Table of Contents
- Why Deep Pantry Shelves Require a Different Approach
- Step 1: Empty and Declutter Your Pantry
- Step 2: How to Group Pantry Items by Category
- Step 3: Choose the Best Pantry Organizers for Deep Shelves
- Step 4: Build DIY Pull-Out Pantry Drawers
- Step 5: Implement a Labeling and Inventory System
- Step 6: Maintain Accessibility and Prevent Chaos
- Common Mistakes to Avoid
Last Updated: August 16, 2026
Why Deep Pantry Shelves Require a Different Approach
Deep pantry shelves present a unique storage challenge that standard organizing advice doesn't address. When shelves extend 18-24 inches back, items stored in the rear become invisible and forgotten. You reach for what's in front, leaving perfectly good food to expire in the darkness behind. This isn't a minor inconvenience, it's wasted money, wasted space, and the reason your pantry feels chaotic even after organizing it.
Standard shelving systems assume you can see everything at once. With deep shelves, that visual inventory breaks down. You can't see what's there, so you buy duplicates and forget what you have. The system collapses within weeks.
At The Reset Aisle, we focus on practical, space-saving solutions for pantries, closets, and drawers. The solution isn't just buying bins, it's changing how you think about reach, visibility, and accessibility. Deep pantry shelves need a layered approach: tools that bring items forward, systems that track what's stored where, and habits that prevent chaos from returning.
This guide walks you through organizing deep pantry shelves, from emptying and categorizing to installing pull-out systems and maintaining your setup long-term. You'll learn which organizers actually work for deep storage, how to build DIY solutions on a budget, and the one mistake that undoes most pantry reorganizations within 30 days.
Step 1: Empty and Declutter Your Pantry
Before you organize anything, you need to see what you actually have. Remove every single item from your pantry. Pull items off shelves, out of corners, from behind other boxes. Check dates on canned goods, spices, and packaged items. If it's expired or you haven't used it in over a year, it goes.
As you pull items down, wipe the shelves with a damp cloth and let them dry completely before replacing anything.
Group items into piles as you go: baking supplies, snacks, canned goods, grains, spices, oils, condiments. This preliminary sorting gives you a visual sense of volume and prevents decision fatigue. Your job right now is removal and assessment, nothing more. You'll organize in the next step.
Step 2: How to Group Pantry Items by Category
Grouping pantry items by category is the foundation of any system that actually sticks. When similar items live together, you know where to look and what you have.
Start with broad categories that match how you cook and shop: baking supplies, grains and pasta, canned vegetables and beans, snacks, spices and seasonings, oils and vinegars, breakfast items, and condiments. Within each category, create subcategories if the volume is large. Spices, for example, benefit from being sorted alphabetically. Canned goods can be sorted by type or by meal purpose.
Use this grouping phase to assess what belongs in your deep pantry versus what doesn't. Items you use multiple times a week should be at eye level or within easy arm's reach. Items you use monthly or seasonally can go deeper.
Keep a small notepad during this phase. As you group items, jot down what you see: "three bottles of soy sauce," "two containers of cinnamon," "four boxes of pasta." This inventory list becomes your reference when setting up your labeling system.
Step 3: Choose the Best Pantry Organizers for Deep Shelves
The right organizers for deep pantry shelves solve two problems: they bring items forward so you can see them, and they create zones within the deep space so nothing gets lost.
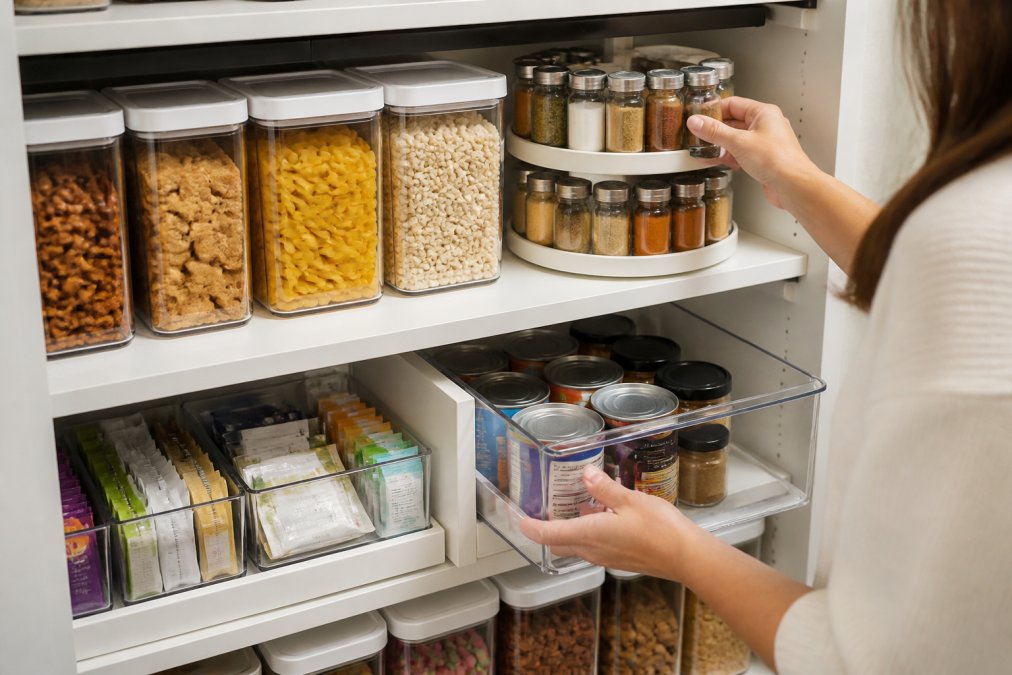
Clear Bins and Stackable Containers
Clear bins are the workhorse of deep pantry organization. Because they're transparent, you can see what's inside without pulling the bin forward. Choose bins that match your shelf depth, typically 12-16 inches for standard pantries.
Stackable containers let you build vertical storage within your deep shelves. Stack two containers and you've doubled your storage capacity without taking up additional shelf space. Look for containers with secure lids that seal properly, especially for items like flour, sugar, and cereal.
Aim for 3-5 large clear bins per shelf, depending on your shelf width and depth. A few larger bins often work better than many small bins, which create visual clutter.
Pull-Out Drawers and Sliding Shelves
Pull-out drawers and sliding shelves transform how you access deep pantry storage. Instead of reaching into darkness, you pull the entire drawer forward, bringing everything into view. This is a highly effective solution for deep pantry organization.
Sliding shelves come in two types: those that install directly onto your existing shelves and those that replace your shelf entirely. The overlay versions are simpler to install and don't require permanent changes to your pantry.
When choosing pull-out systems, verify weight capacity. Look for systems rated for at least 50 pounds. Cheap systems with thin metal or plastic may sag under load.
Lazy Susans and Turntables for Corner Access
A rotating turntable solves a specific problem: accessing items at the back corners of deep shelves. These tools are particularly useful for spices, oils, condiments, and other frequently-used items.
Place a turntable on your shelf and arrange bottles or jars around it. Rotate to access items at the back. The Double-Layer Rotating Spice Rack from The Reset Aisle ($24.99) maximizes vertical space while keeping spices organized and accessible.
Turntables work best on shelves with at least 16 inches of depth. Choose turntables with a non-slip surface so containers don't slide during rotation.
Shelf Dividers and Vertical Storage
Shelf dividers prevent items from tipping over and create distinct zones within your deep shelves. They're particularly useful for organizing items like baking sheets or stacks of containers.
Vertical storage systems, stackable shelves that sit on top of your existing shelves, add a second layer of storage without requiring installation. These work well for lightweight items like snacks or small jars.
Step 4: Build DIY Pull-Out Pantry Drawers
If you're handy and want a custom solution, building your own pull-out pantry drawers can be a more affordable option than buying pre-made systems.
Materials You'll Need
Gather these materials before you start:
- One sheet of plywood (3/4-inch thickness, cut to your shelf dimensions)
- Drawer slides rated for at least 50 pounds
- Wood screws (1.25-inch)
- Wood glue
- Sandpaper (120 and 220 grit)
- Drill with bits
- Saw
- Level
- Measuring tape
The plywood forms your drawer base. The slides attach to your shelf and the drawer, allowing smooth movement. Make sure your slides match your shelf depth.
Installation Steps
-
Measure your shelf dimensions. Subtract 1/2 inch from the width to ensure the drawer slides freely. Cut your plywood to these dimensions.
-
Sand all edges and surfaces of the plywood. Use 120-grit sandpaper first, then finish with 220-grit for a smooth surface.
-
Attach the drawer slides to the underside of your plywood, following the manufacturer's instructions. Most slides attach 1-2 inches from each edge. Use a level to ensure the slides are perfectly parallel.
-
Install the corresponding slides onto your pantry shelf. Use a level and follow the manufacturer's spacing instructions precisely. Misalignment is the most common cause of drawer problems.
-
Slide the drawer onto the installed slides. Test the movement. It should glide smoothly without binding or tilting. If it doesn't, check that both sets of slides are level and properly aligned.
-
Load your drawer with items, starting light and gradually adding weight. Test the movement again.
This DIY approach gives you a custom solution that fits your exact shelf dimensions. The result is a durable, smooth-operating drawer that solves the deep pantry problem.
Step 5: Implement a Labeling and Inventory System
A labeling system tells you what's inside each container and trains your household to return items to the correct location. Without labels, your system degrades within weeks.
Use a label maker or write directly on labels with a permanent marker. Include the item name and the date you opened it (for perishables) or the expiration date. For bulk items, also note the quantity so you know when to reorder.
Create a simple inventory list on your phone or a printed sheet posted inside your pantry door. Update it when you use up a category or add new stock. This prevents you from buying duplicates and helps you meal plan based on what you actually have.
Step 6: Maintain Accessibility and Prevent Chaos
Organization systems fail because they're not maintained. The key to long-term success is building a maintenance routine and designing your system for accessibility.
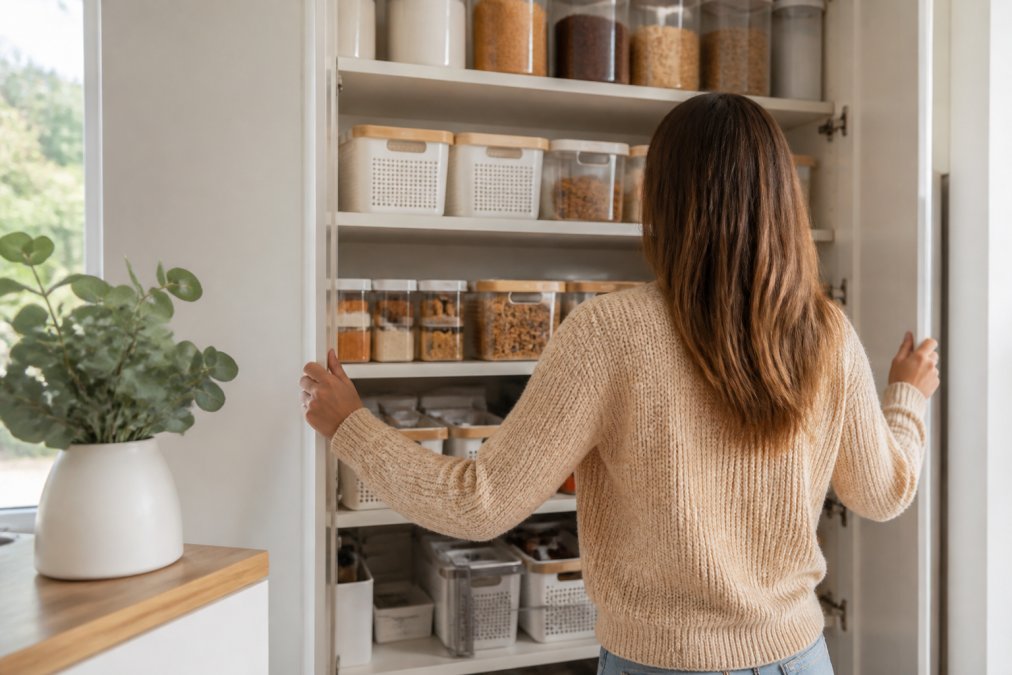
Position the items you use most frequently at eye level or within easy reach. Don't put everyday items in the back of deep shelves where you can't access them without effort. Convenience drives behavior. If reaching for an item requires a stool or deep stretch, you'll stop reaching for it.
Implement a "first in, first out" rotation system, especially for canned goods and packaged items. When you restock a category, place new items behind older items so older stock gets used first.
Set a monthly maintenance routine. Spend 15 minutes checking expiration dates, wiping down shelves, and ensuring items are in their correct categories. This small investment prevents the slow drift toward chaos.
Make sure family members know where things belong. Label clearly and explain the system. If someone consistently puts items in the wrong place, either move that item to where they naturally look for it, or retrain them. Your system should work with your household's habits, not against them.
Accessibility matters more than perfect aesthetics. Position frequently-used items between waist and eye level. Use pull-out drawers and turntables to eliminate reaching into dark corners. A system that works for everyone is a system that lasts.
Common Mistakes to Avoid
Most pantry reorganizations fail within 30 days because people make the same preventable mistakes.
The first mistake is buying organizers before you know what you're organizing. Measure your shelves, assess your items, and choose organizers that fit your situation, not the other way around.
The second mistake is creating a system too complicated to maintain. If your system requires labeling everything by date, tracking inventory in a spreadsheet, and rotating items weekly, it will fail. Start simple: clear bins, basic labels, a monthly check-in.
The third mistake is ignoring accessibility. If you can't easily reach items, you won't use them. Always prioritize accessibility over storage density.
The fourth mistake is not addressing the root cause of pantry chaos: too much stuff. Declutter first. Organize second. That order matters.
A deep pantry is an asset only when you can actually access what's inside. The Reset Aisle approach transforms deep shelves into functional storage by combining the right tools, pull-out drawers, clear bins, turntables, with a simple system you can maintain. Start with decluttering and categorizing. Choose organizers that bring items forward and keep them visible. Implement basic labeling and a monthly maintenance routine. The result is a pantry that stays organized because it's designed to work with your actual habits. Start Your Reset and transform your deep pantry into a space where you know exactly what you have and can reach it easily.
Frequently Asked Questions
How do you organize a pantry that is too deep?
Use a combination of clear bins, pull-out drawers, and turntables to make back items accessible. Organize deep pantry shelves by placing frequently used items at eye level, storing bulk items in the back, and installing sliding shelves or lazy susans to rotate items forward without reaching. Vertical dividers and shelf liners prevent items from shifting, while labels help you locate items quickly without emptying the entire shelf.
What are the best pantry organizers for deep shelves?
The best organizers combine accessibility with space efficiency. Clear stackable containers let you see contents without opening them, pull-out drawers bring back items forward, and lazy susans provide 360-degree access to corner items. For budget-friendly options, use tension rods to create zones, cardboard dividers to separate categories, and shelf liners to prevent sliding. The Double-Layer Rotating Spice Rack ($24.99) works well for frequently accessed items, while an Under Sink Organizer with Sliding Shelves ($34.99) demonstrates the pull-out principle that works equally well in pantries.
Are pull-out drawers worth it for deep pantry shelves?
Yes, pull-out drawers transform deep pantry organization by eliminating the need to reach or crouch into the back of shelves. They cost more upfront than bins alone, but save time and reduce food waste by keeping overflow items visible and accessible. DIY pull-out options using sliding tracks cost $15-30 per drawer and can be installed in under an hour, making them a practical middle-ground solution for deep shelves.
How can I make items in the back of my pantry accessible?
Install pull-out drawers or sliding shelves, use lazy susans to rotate items forward, and place turntables on fixed shelves for corner access. Store smaller, lighter items in the back (spices, seasonings, baking supplies) and heavier bulk items in front. Label everything so you know what's stored deep inside without searching. A simple inventory list or photo system helps you remember what you have without opening every container.
This article was written using GrandRanker