

Table of Contents
- Measure Your Shelf Dimensions Before Buying Organizers
- Use Pantry Shelf Risers to Create Additional Levels
- Stack and Organize with Pantry Storage Bins
- How to Organize Pantry Shelves with Rotating Organizers
- Create a Pantry Inventory List to Prevent Duplicate Purchases
- Maximize Vertical Space in a Deep Pantry: A Step-by-Step Setup
- Common Mistakes to Avoid When Organizing a Deep Pantry
- Frequently Asked Questions
Last Updated: October 17, 2026
Measure Your Shelf Dimensions Before Buying Organizers
The first step to maximize vertical space deep pantry is measuring what you actually have. Most people skip this and buy organizers that don't fit.
Record three numbers per shelf: width, depth, and height to the next shelf.
Measure from back wall to front edge.
Note obstacles: pipes, outlets, or uneven shelving. Exact dimensions prevent wasted money on organizers that don't fit your space.
Use Pantry Shelf Risers to Create Additional Levels
Shelf risers are the simplest way to add storage without new furniture.
Adjustable risers customize the gap; fixed risers are cheaper and more stable.
Install risers at the back of deep shelves first, this brings hard-to-reach items up to eye level while front items stay accessible.
The Expandable Kitchen Storage Shelf from The Reset Aisle ($29.99) works as a space-creating riser for spices, cups, and small food items.

Stack and Organize with Pantry Storage Bins
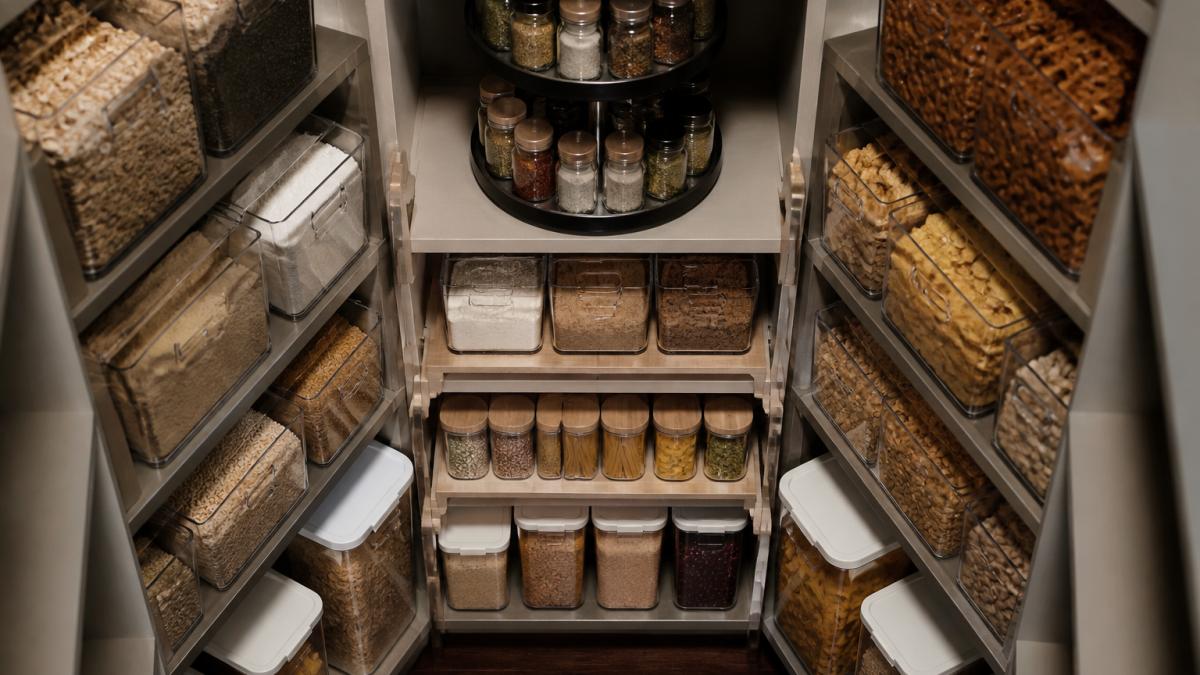
Clear storage bins are non-negotiable for a deep pantry: you see what's inside without pulling everything out, and they stack to use vertical space efficiently.
Choose Clear Bins for Visibility
Opaque bins hide food, six months later you buy pasta again because you forgot the three boxes in the back.
Look for bins with handles: they pull out of tight spaces easier and stack more safely because you can grip them.
Stackable bins come in sizes: small for snacks and spices, medium for pasta, rice, and grains, large for bulk and baking supplies.
Label each bin on the front and spine with a marker or printed labels.
Group Items by Category and Frequency of Use
Organize by frequency: daily items at eye level, weekly items on middle shelves, rarely-used specialty ingredients higher or lower.
Group similar items: baking in one zone, pasta and grains in another, snacks in a third. This prevents duplicates because you know where everything lives.
Arrange items so labels face forward, two minutes of work that shows you at a glance what you have and need.
How to Organize Pantry Shelves with Rotating Organizers
Lazy Susans and rotating turntables solve the deep pantry problem. Items at the back are no longer unreachable. You spin and everything comes to you.
Lazy Susans for Easy Access to Back-Row Items
A lazy Susan works best for regularly used small jars: spices, seasonings, condiments.
The Double-Layer Rotating Spice Rack from The Reset Aisle ($24.99) spins a full 360 degrees. Both tiers rotate together. Every jar comes to you.

Position the lazy Susan at the back of a deep shelf to create a "reach zone" for the most-used items. Rotate it when you cook and nothing gets lost.
Create a Pantry Inventory List to Prevent Duplicate Purchases
Organizing the physical space is half the battle; knowing what you have is the other half. Without an inventory system, you'll keep buying duplicates no matter how neat your pantry looks, and this is the step that actually changes your grocery bill.
Build a Three-Column Inventory That Matches Your Zones
Skip the elaborate spreadsheet. A workable inventory needs three columns: Item, On Hand, and Reorder At.
Set the reorder point by usage speed: a household going through a box of pasta every two weeks might set it at two boxes; a monthly spice might have a reorder point of zero.
Match inventory categories to your shelf zones: grains and pasta, canned goods, baking, snacks, spices, backup stock.
Choose a Tracking Method You'll Actually Maintain
Three methods work for most households. Pick one and commit:
- Paper on the inside of the pantry door. A clipboard or a sheet taped inside the door is visible exactly when you're putting groceries away. Cross off when you use, add when you restock. Best for households where more than one person cooks.
- A shared note on your phone. A single note app list that everyone in the household can edit. Best for people who shop from their phone and want the list with them in the store.
- A photo roll plus a written list. Photograph each shelf after your weekly reset, then keep a short written list of quantities for high-turnover items. Photos catch what the list misses; the list catches what the photos blur.
A common pattern is to combine the phone note with a monthly photo set. The note handles the weekly shopping trip; the photos handle the 'do we already have chickpeas?' question in the aisle.
Expandable Kitchen Storage Shelf – Freestanding Spice & Cabinet Organizer →
Run a Five-Minute Weekly Reset and a Twenty-Minute Monthly Audit
The weekly reset keeps the system alive. Once a week, many do it the night before grocery day, walk the pantry with the list open, mark what's low, and add anything at or below its reorder point to the shopping list.
The monthly audit is deeper: open each bin, check dates, move older items to the front and newer behind (first in, first out), update quantities.
Use the List at the Store, Not After
The inventory only prevents duplicates if you check it before you shop. Before you leave, open the list and cross off anything you already have enough of.
This is where the reorder point earns its keep: without it, every sale looks like a reason to stock up; with it, you see at a glance whether the sale item is actually below your threshold.
Maximize Vertical Space in a Deep Pantry: A Step-by-Step Setup
Here's how to maximize vertical space deep pantry by putting it all together. This process takes an afternoon. The result is a pantry that works for months without falling back into chaos, and a zoning plan that makes the back of a deep shelf as usable as the front.
Step 1: Audit, Measure, and Zone Before You Buy Anything
Empty the pantry completely and sort into keep, donate, and trash.
Before putting anything back, measure each shelf's width, depth, and clear height. Deep pantries commonly run 18 to 24 inches front to back, and shelf gaps vary by several inches.
Then zone the pantry by depth, not just by category. A deep shelf has three usable bands:
- Front band (roughly the first 6 to 8 inches): daily-use items you want to grab without reaching, cooking oils, the salt and pepper you actually cook with, the snack bin the kids open after school.
- Middle band: weekly-use items, pasta, rice, canned goods you rotate through, baking staples.
- Back band: backup stock and rarely used items, the second jar of mayo, holiday baking supplies, bulk backups. This is where risers and turntables earn their place, because the back band is the one that gets forgotten and duplicated.
Write the zones down and tape the plan inside the pantry door, everyone needs to know where things live, or the system collapses in a week.
Step 2: Build the Vertical Structure, Risers First, Then Bins
Put shelf risers on the back band of your deepest shelves first.
Then add clear stackable bins sized to the zones: small for snacks and spices, medium for pasta and grains, large for bulk and baking.
Leave a finger's width of clearance between stacked bins and the shelf above. Overstuffed bins don't slide, and a bin that won't slide is one whose contents you'll forget.
Step 3: Add Rotation and Pull-Out Access for the Back Band
Place a lazy Susan or turntable in the back band of a shelf holding small jars, spices, condiments, seasonings. The back row becomes the front row every spin.
If a deep shelf has pipes, an outlet, or an awkward corner blocking the back, a pull-out bin or drawer slides the whole shelf's contents toward you. Measure the opening before buying, pull-outs need a clear path to slide.
Step 4: Set the Rotation and Restock Routine
Older items go in front, newer in back, first in, first out. When restocking, load new items behind old ones in the same zone.
Start the inventory list the day you finish setup: write down everything you organized, set a reorder point for each high-turnover item, and put the list where you'll see it before every shopping trip. Update it during the weekly reset.
Common Mistakes to Avoid When Organizing a Deep Pantry
Not measuring shelves first. You buy organizers that don't fit. Measure before buying anything.
Using opaque bins. You can't see what's inside. Clear bins are non-negotiable.
Ignoring the back of deep shelves. Items expire and get forgotten.
Not labeling anything. Labels take two minutes. They save hours of searching and prevent duplicates.
The Reset Aisle makes this easier with products designed to fit real pantries.
Start by measuring your shelves. Add risers and clear bins.
Frequently Asked Questions
How do I organize a deep pantry so I can see everything?
Use a combination of shelf risers, clear stackable bins, and rotating organizers like lazy Susans. Shelf risers create additional levels within your existing shelf space, while clear bins let you see contents without opening them. Place frequently used items at eye level and rotate items stored in the back using a lazy Susan so nothing gets lost or forgotten.
How can I use vertical space in a pantry to stop buying duplicates?
Maximize vertical space by adding shelf risers to double your storage capacity, then organize items in visible, labeled bins by category. Keep a simple pantry inventory list on your phone or posted on the door. Before shopping, check your list to see what you already have. This visibility prevents buying items you forgot were in the back of deep shelves.
What's the best way to organize pantry storage bins on deep shelves?
Group bins by category (grains, snacks, canned goods, spices) and place the most frequently used items at eye level. Use clear bins so you can quickly spot what's inside without removing them. On deep shelves, position bins toward the front for easy access, and consider adding pull-out drawers or sliding organizers to reach items at the back without digging.
Are pantry shelf risers actually useful for deep shelves?
Yes. Shelf risers create an extra tier within your existing shelf space, effectively doubling your storage capacity without taking up floor space. They work especially well in deep pantries where vertical space is underused. An expandable shelf riser like the Expandable Kitchen Storage Shelf ($29.99) adjusts to fit different cabinet and countertop spaces and requires no installation, making it ideal for renters or anyone hesitant about permanent changes.