

Table of Contents
- Step 1: Clear the Counters and Map Your Small Kitchen
- Step 2: Declutter First, Buy Nothing Yet
- Step 3: Zero Waste Kitchen Organization Starts With What You Already Own
- Step 4: Choose Eco-Friendly Pantry Storage Containers That Last
- Step 5: Small Kitchen Storage Hacks for Tight Spaces
- Step 6: Build Work Zones and Keep Them Working
- Common Mistakes That Undo a Small Kitchen Reset
- Frequently Asked Questions
Last Updated: September 13, 2026
Step 1: Clear the Counters and Map Your Small Kitchen
Learning how to organize a small kitchen with sustainable tools starts with subtraction, not shopping. Clear every counter completely, then map what actually has to live there. This guide from The Reset Aisle walks through six steps, from decluttering to building work zones that hold up over time.
A small kitchen is a cooking space where storage capacity, not appliance count, decides how well the room functions (homesandgardens.com). That definition matters because it shifts the goal: you are not decorating, you are allocating.
Here's what most people get wrong. They buy containers before they know what they own. The result is a cabinet full of bins holding nothing, which is clutter wearing a nicer outfit.
What You'll Need Before You Start:
- A tape measure and a notepad
- Two boxes: one for relocation, one for donation
- A damp cloth for wiping shelves as you empty them
- About two hours of uninterrupted time
Measure shelf depth, cabinet height, and the distance between the counter and upper cabinets. Write the numbers down. Every purchase decision later depends on them.
Step 2: Declutter First, Buy Nothing Yet
Decluttering is the highest-impact, lowest-cost step in small kitchen organization, and it comes before any purchase. Empty one cabinet at a time, check expiration dates, and set aside anything you have not used in a year.
The USDA FoodSafety.gov guidance on food storage and shelf life is a useful reference when you're deciding what to keep.
Work through these categories:
- Expired spices, baking supplies, and pantry staples
- Duplicate tools (two can openers, three spatulas)
- Appliances you use less than once a month
- Containers missing lids, and lids missing containers
Be honest about the appliances. A bread maker that has run twice in three years is occupying prime real estate.
Nothing gets purchased in this step. Buying storage before you know what remains is how kitchens end up cluttered again within a month.
Step 3: Zero Waste Kitchen Organization Starts With What You Already Own
Zero waste kitchen organization begins with repurposing what you already have rather than buying new storage. Glass jars, sturdy boxes, and existing containers can handle most pantry and drawer jobs once they're clean and matched to the right category.
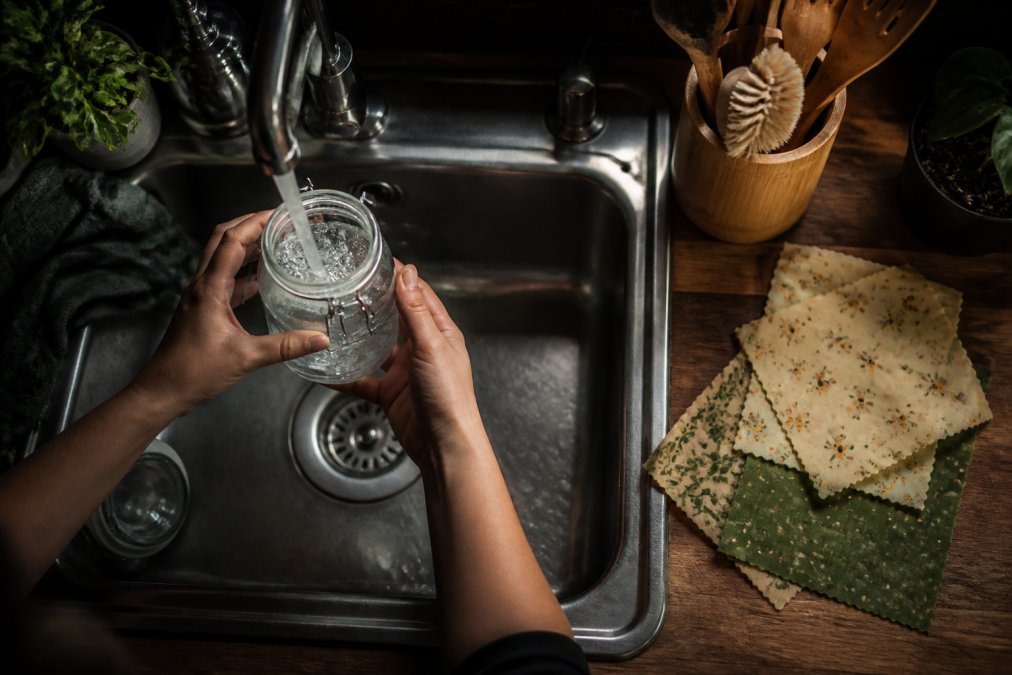
Empty glass jars from sauces, jams, and pickles become spice, grain, and leftover storage after a hot soapy wash (the EPA). Remove the label residue with a little oil, then run them through the dishwasher.
Repurposed Jars, Beeswax Wraps, and the Lifecycle Test
The lifecycle test is a simple filter: before buying any "sustainable" tool, ask what happens to it in five years. A glass jar gets reused indefinitely. A cheap plastic bin cracks, yellows, and lands in a landfill.
Apply the test to three questions:
- What is it made of, and can that material be recycled locally?
- How long will it realistically last with daily use?
- Can it be repaired or repurposed when it wears out?
Beeswax wraps replace plastic cling film for covering bowls and wrapping produce. Stainless steel and bamboo tools outlast their plastic equivalents by years. Silicone holds up well but is difficult to recycle, so treat it as a long-term purchase rather than a disposable one.
Step 4: Choose Eco-Friendly Pantry Storage Containers That Last
Eco-friendly pantry storage containers earn their place by lasting, not by their label. Glass, stainless steel, and bamboo are the materials that survive years of daily use, and they don't hold onto odors or stains the way plastic does. But the more useful question isn't which material is "greenest", it's which container gives you the most uses per dollar and per unit of manufacturing energy.
Match the material to the job:
| Material | Best For | Watch Out For |
|---|---|---|
| Glass | Spices, grains, leftovers | Weight on high shelves; thermal shock if moved hot-to-cold |
| Stainless steel | Flour, sugar, bulk staples | Not microwave safe; dents if dropped |
| Bamboo | Utensils, drawer dividers | Needs drying after washing; can mold if stored damp |
| Silicone | Lids, collapsible bowls | Hard to recycle; absorbs odors over time |
Clear containers win for one practical reason: you can see what's inside without opening them. That single feature reduces duplicate purchases and forgotten food.
The Lifecycle Cost Test, Applied to Containers
Most buying guides stop at the material table. The more honest filter is lifecycle cost: how many uses you get before the item fails, divided by what it cost you in money and in embedded manufacturing energy.
Run the numbers on a single pantry staple, say, a five-pound bag of flour:
- A repurposed glass jar you already own: zero new manufacturing, effectively unlimited refills, and it can be recycled at curbside if it ever breaks.
- A new glass container with a locking lid: durable, but the lid gasket is the failure point, most gaskets degrade within a few years and replacements are often discontinued.
- A plastic bin: cheap up front, but it yellows, cracks at the corners, and typically fails within two to four years of daily opening.
- A stainless steel canister: the highest upfront cost, but the body outlasts the lid seal and can be re-sealed with a generic gasket.
The pattern most people find: the container you already own almost always wins the lifecycle test, because its manufacturing cost is already sunk. That's why Step 3 comes before this one.
A second filter is repairability. Before buying, ask whether the failure point, usually a lid, gasket, or hinge, can be replaced independently of the body. A container with a proprietary lid that can't be reordered is a disposable item wearing a durable material.
How to Clean and Maintain Sustainable Tools
Maintenance is what separates tools that last from tools that disappoint. Glass and stainless steel go in the dishwasher. Bamboo should be hand-washed and dried upright so it doesn't warp or crack.
Every few months:
- Wipe stainless steel with a soft cloth to prevent water spots
- Oil bamboo and wooden items lightly to stop them drying out
- Check silicone seals and lids for cracks or lingering odors
- Remove jar labels fully so adhesive doesn't trap grime
- Inspect glass rims for chips, which weaken the jar and can cut
A maintenance routine takes ten minutes a quarter and adds years to the life of your tools. It also tells you when something has genuinely reached end of life, so you replace it deliberately instead of accumulating a drawer of half-working containers.
Step 5: Small Kitchen Storage Hacks for Tight Spaces
Small kitchen storage hacks work by using the space you already have more completely, not by adding furniture. Vertical storage, shelf risers, and drawer dividers recover capacity that flat stacking wastes, and the cheapest versions of each are built from things already in your home.
Start with the vertical plane. Stacking upward uses height that most small kitchens leave empty:
- Install a riser to double a single cabinet shelf
- Hang utensils and pans on a rail or hook strip
- Use the inside of cabinet doors for narrow items
- Add stackable containers for bulk staples
Drawer dividers stop the avalanche problem. A divided drawer holds more usable items than a deep one, because you can reach the back without excavating the front.
DIY Storage From Reclaimed Materials
Most guides on this topic end at "buy a riser." The more sustainable move is to build the riser from what you already have, which avoids new manufacturing entirely. A few that hold up in daily use:
- Shoe box as a drawer divider. Cut the lid off, trim the box to drawer depth, and you have a compartment for utensils or foil. Cardboard lasts a year or two; swap it for a wooden wine crate cut down to size for a longer-lived version.
- Repurposed glass jars as drawer bins. Wide-mouth jars from salsa or pickles hold rubber bands, twist ties, and small tools, and you can see the contents without opening the drawer.
- A cutting board as a shelf riser. Two short lengths of scrap wood under a board create an instant second tier in a cabinet, no hardware, no drilling.
- Old baking sheet as a magnetic strip backing. Mount a strip of magnetic tape to a sheet pan and hang it inside a cabinet door for knives or metal spice tins.
- Wine crate as a stackable bin. Wine crates are sized for bottles but work equally well for canned goods, and they stack because their walls are rigid.
The trade-off is time versus money. A DIY riser costs an afternoon and nothing else; a purchased one costs money and arrives in packaging. Neither is wrong, but if the goal is a genuinely sustainable kitchen, the reclaimed version wins the lifecycle test from Step 4.
For the cabinet under the sink, The Reset Aisle's Under Sink Organizer with Sliding Shelves turns the tangle around the pipes into pull-out storage. Two pieces, a sliding shelf design, and a frame that handles daily use.

Step 6: Build Work Zones and Keep Them Working
Work zones organize a kitchen by task rather than by category, and they're the reason a reset holds. Group everything for one activity in one place so you stop crossing the room mid-recipe.
Three zones cover most small kitchens:
- Prep zone: cutting board, knives, bowls, compost bin
- Cooking zone: spices, oils, utensils within arm's reach of the stove
- Cleaning zone: under-sink supplies, dish soap, towels, bin
The spice rack is the clearest test of whether a zone works. If you're digging for the paprika, the zone has failed. The Reset Aisle's Double-Layer Rotating Spice Rack is a free-standing 360-degree turntable with two tiers, so the back row becomes the front row. No mounting, no drilling.

If you want both problem spots handled together, The Kitchen Reset bundles the spice rack and the under-sink organizer at $52.99, below the combined price.

The zones only hold if you return items to their zone after use. That habit, not the container, is what keeps a kitchen organized.
Common Mistakes That Undo a Small Kitchen Reset
The most common mistake is buying storage before decluttering, which locks in clutter instead of removing it. Four others show up constantly:
- Buying a matching set sized for a kitchen that isn't yours
- Skipping maintenance on bamboo and silicone, which shortens their life
- Ignoring accessibility by stacking daily items on high shelves or in deep corners
- Organizing by category when the kitchen actually runs on tasks
That last one deserves attention. A pantry sorted by "cans" and "boxes" looks tidy and works badly. A pantry sorted by "what I reach for while cooking" works every day.
Accessibility matters more in small kitchens, not less. If reaching a shelf requires a step stool, the item on it will migrate to the counter within a week.
A small kitchen resets easily enough. Keeping it that way is the harder part, because clutter returns the moment storage stops matching how you actually cook. The Reset Aisle builds space-saving organizers for pantries, closets, and drawers, with a focus on making what you already own work harder: sliding under-sink shelves, a 360-degree rotating spice rack, and bundled sets that cover the two worst clutter spots in one afternoon. Start your reset with The Reset Aisle and give every item in your kitchen a place it can actually stay.
Frequently Asked Questions
How do I organize an extremely small kitchen without spending much?
Start by removing everything from your counters and one cabinet at a time, then put back only what you used in the past month. Before buying anything, reuse glass jars, tins, and boxes you already have. When you do buy, pick one piece that solves a real bottleneck, like a two-tier rotating spice rack at $24.99 or an under-sink organizer at $34.99, instead of a full matching set. Fewer, better pieces beat a cheap haul every time.
What are the best sustainable materials for kitchen organizers?
Bamboo, stainless steel, glass, and silicone hold up best in a small kitchen because they resist moisture and daily wear. Bamboo works for drawer dividers and shelf risers, stainless steel suits under-sink racks, and glass handles pantry staples without holding onto odors. Avoid thin plastic bins that crack within a year, since replacing them is the opposite of sustainable. Check how each item is cleaned before you buy, because a tool you cannot maintain will not last.
How can I reduce plastic waste while organizing my pantry?
Move dry goods from flimsy bags into glass containers or repurposed jars you already own, and buy staples in bulk to cut packaging. Beeswax wraps replace plastic wrap for leftovers and half-used produce. When you need new storage, choose durable materials like stainless steel or glass over single-use plastic bins. The goal is fewer items that last years, not a shelf full of matching plastic that needs replacing.
What are the best space-saving hacks for tiny kitchens?
Use vertical space first: stack shelves upward, hang tools on the wall, and add a shelf riser inside cabinets. Group items by work zone so cooking, prep, and cleaning supplies each live in one spot. A rotating spice rack keeps a whole cabinet's worth of jars in one footprint, and sliding under-sink shelves turn awkward pipe space into pull-out storage. Label everything so the system survives a busy week.