

Last Updated: October 23, 2026
Quick Summary
DIY toy storage labels for kids work best when you sort toys into categories first, then match the label material and attachment method to the bin. Use paper or cardstock for bins kids rarely touch, vinyl or laminated cards for daily handling, and clip-on holders for fabric bins. Pair every word with a big, bold picture so pre-readers can sort on their own.
- Measure your bins before buying labels or holders so they sit flat and clip on.
- Round the corners and seal all four edges of every label to prevent peeling.
- Printable labels are faster and uniform; handmade labels are cheaper and build kid buy-in.
- Match attachment to surface: adhesive for plastic and wood, clip-on holders for fabric.
- Start with five to seven broad categories and keep one misc bin for stray pieces.
Table of Contents
- What You'll Need Before You Start Labeling
- Step 1: Sort Toys Into Categories Before You Label
- Step 2: Choose Printable Toy Storage Labels or Make Your Own
- Step 3: Add Toy Bin Labels With Pictures for Kids Who Can't Read Yet
- Step 4: Make DIY Labels for Fabric Storage Bins That Stay Put
- Step 5: Attach Labels So They Don't Peel Off
- Toy Bin Label Ideas That Work for Different Ages and Rooms
- Common Mistakes to Avoid
- Frequently Asked Questions
What You'll Need Before You Start Labeling
DIY toy storage labels for kids work best when you gather supplies first. A little prep turns a quick craft project into a system that lasts past the first week.
The bin itself matters as much as the label. Start with sturdy containers that can take a hit from a toddler and still hold their shape.
Before you print or cut a single label, collect these basics:
- Storage bins or baskets that fit your shelf depth
- Label material: paper, cardstock, or printable sticker sheets
- A printer (or a marker if you're going no-tech)
Measure your bins before you buy labels or holders, a label that's too wide won't sit flat, and a holder that's too small won't clip on. Durable storage bins for kids are worth checking first, since the bin's surface decides which attachment method works.
Choose Your Label Material by Wear, Moisture, and Safety
The supply list is the short version. The longer version is a materials decision, and it's where most labeling projects quietly succeed or fail. Four options cover almost every home playroom:
- Plain paper. Cheapest to print at home, but it creases, tears, and smears. Best for low-traffic bins or labels inside a sleeve.
- Cardstock. Stiffer and holds up to handling, but still needs sealing on plastic and wood. A good middle ground for picture labels kids will touch.
- Printable sticker sheets. Fast and uniform, but adhesive lifts at the edges on soft or dusty surfaces. Works best on smooth plastic and sealed wood.
A practical rule most families land on: paper or cardstock for bins kids rarely touch, vinyl or laminated cards for bins that get daily handling, and a clip-on holder for anything fabric.
Child-Safe Placement and Edge Care
Labels on kids' bins also need to be safe to handle:
- Round the corners. Sharp corners catch small fingers and peel first. A quick snip with scissors solves it.
- Seal all four edges. Run clear tape or a laminating sheet over the whole label, not just the center.
- Keep small parts out of reach. Avoid loose pins, tiny clips, or removable pieces on bins used by children under three.
None of this requires special equipment, just the right material for the bin and two minutes to seal and round the edges.
Step 1: Sort Toys Into Categories Before You Label
Sorting comes before labeling. If you label first, you'll end up relabeling within a week. Dump everything into one pile and group by type:
- Building toys: blocks, magnetic tiles, train tracks
- Pretend play: dress-up clothes, play food, dolls
- Art supplies: crayons, paper, stickers, clay
Now look at volume. A category that fills three bins needs three labels; one that fills a quarter of a bin can share space with a neighbor. Most families quit here, they label first, then discover the categories don't match how their kids actually play. Sort first, and the labels write themselves.
Step 2: Choose Printable Toy Storage Labels or Make Your Own
You have two paths: print them or make them by hand. Printable toy storage labels are faster and look uniform; handmade labels are cheaper and let kids help, which builds buy-in.
Go printable for matching labels across a shelf, clean text plus a picture on each bin, and easy replacements. Go handmade for kids to draw their own bin pictures, zero printing costs, and a looser, more playful look.
Free Label Templates and Instant Downloads
Free label templates and instant downloads save the most time. Search for editable templates sized to standard bin fronts, then fill in your categories before printing.
- Choose templates sized to your bin, not the other way around
- Print on cardstock for stiffness, or sticker sheets for speed
- Print a spare set now, so a torn label doesn't stall the system
If you'd rather skip the printer, grab index cards and a marker, same result, ten minutes, no ink.
Step 3: Add Toy Bin Labels With Pictures for Kids Who Can't Read Yet
Toy bin labels with pictures let pre-readers sort toys on their own. A word alone means nothing to a three-year-old; a picture of a car does.
Where do the pictures come from? Print clip-art icons and glue them on, cut pictures from toy catalogs or packaging, or let kids draw the picture themselves. That last one matters: a bin a child decorated is a bin they'll actually use.
Step 4: Make DIY Labels for Fabric Storage Bins That Stay Put
DIY labels for fabric storage bins fail for one reason: fabric flexes. Tape and stickers peel off a soft surface fast.
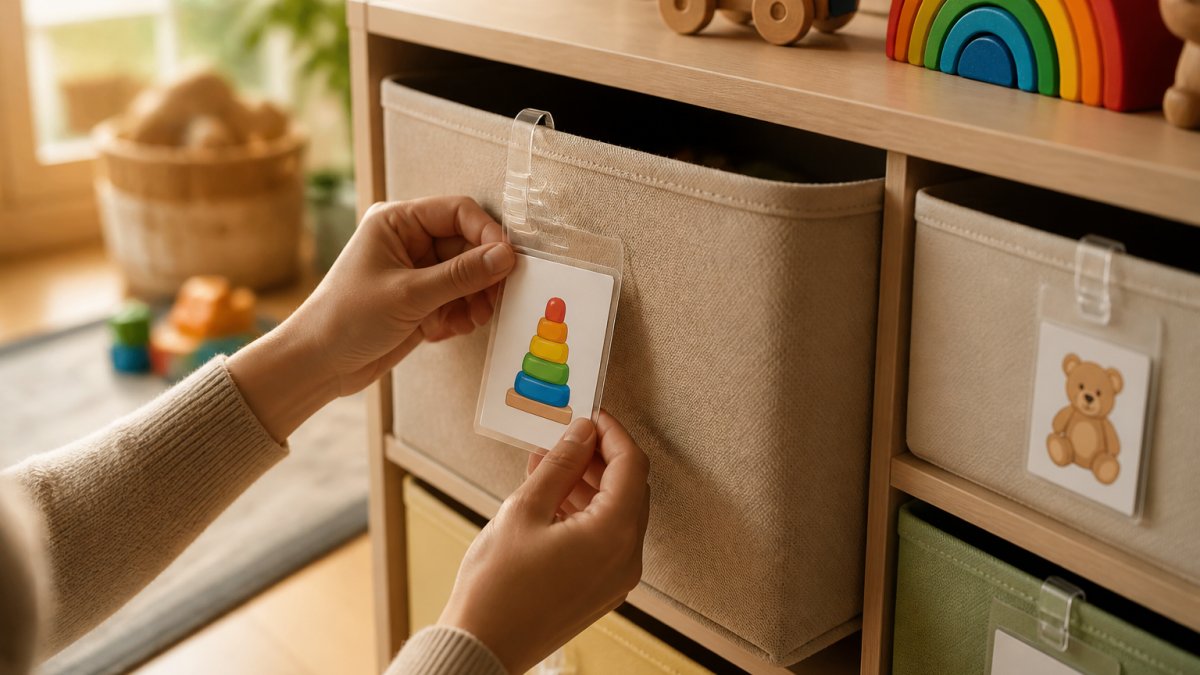
The fix is to stop sticking and start clipping. Clip-on label holders grab the bin's rim or handle and hold the label away from the fabric.
If you're still choosing bins, stackable bins for small spaces are worth a look before you attach anything, since holder style depends on rim shape and handle design.
Attachment Methods by Bin Material
Match the method to the surface. This table covers the common bin types:
| Bin Material | Best Attachment | Avoid |
|---|---|---|
| Fabric or canvas | Clip-on holder, hang tag | Stickers, tape |
| Plastic | Peel-and-stick vinyl, suction clip | Paper labels |
| Wood | Adhesive label, small screw-in plate | Removable tape |
| Wicker or woven | Hang tag on handle, twine tie | Flat stickers |
| Cardboard | Adhesive label, laminated card in sleeve | Heavy clips |
The pattern: hard, smooth surfaces take adhesive; soft or textured surfaces take a clip, tag, or tie.
Step 5: Attach Labels So They Don't Peel Off
A label that peels off in a week wastes the whole effort. Prep the surface and pick the right spot:
- Clean the surface. Wipe dust and grease off plastic and wood, then let it dry fully.
- Place the label low and centered. Kids look at the front of a bin at their own eye level, not the top edge.
- Press and hold. Adhesive needs firm pressure for a few seconds to bond.
- Seal the edges. Run clear tape or a laminating sheet over paper labels on plastic and wood.
- Test the pull. Tug gently. If it lifts, add a holder or switch methods.
For fabric bins, skip to a clip-on holder, the only method that survives regular handling.
Toy Bin Label Ideas That Work for Different Ages and Rooms
The best toy bin label ideas change with the child's age and the room's job. The label itself, its size, type, color, and picture, should change with the reader, not just the room. Match the style to the setting:
- Toddlers (ages 1-3): One big picture, no text. Clip-on holders they can't peel off.
- Preschool (ages 3-5): Picture plus one word. Let them "read" the picture.
- Early readers (ages 5-7): Word-forward labels with a small icon. Add a color code per category.
For households juggling several kids and rooms, durable storage bins for busy families are worth reviewing before you finalize a label scheme. One idea that punches above its weight: label the shelf, not just the bin. A matching icon on the shelf tells a kid exactly where the bin belongs, turning cleanup into a matching game.
Design Labels for Different Readers and Abilities
Age is a rough proxy. The better question is who is reading this label, and how. A few design choices make labels work for a wider range of kids:
- Picture-plus-word pairs. Pair every word with a simple image so a pre-reader can sort without an adult. Keep the picture large and the word small.
- Readable type. Use a clean, high-contrast sans-serif in a large size. Avoid all-caps strings, script fonts, and thin strokes.
- Color cues. Assign one color per category and repeat it on the bin, the shelf label, and any printed inventory, a second sorting channel for kids who can't yet read the word.
A Practical Category System That Survives Real Play
The label scheme only works if the categories match how kids actually play. A few rules keep the system honest:
- Start broad. Five to seven categories cover most playrooms. Add subcategories only when a bin overflows.
- Label by how toys are used, not by brand or set. "Building toys" survives longer than "magnetic tiles set."
- Leave one "misc" bin. Every system needs a catch-all for stray pieces.
Common Mistakes to Avoid
Most labeling systems fail for predictable reasons:
- Labeling before sorting. You'll relabel within a week. Sort first.
- Using words only for pre-readers. Pictures do the work for kids under five.
- Sticking paper labels on fabric. They peel. Use a clip-on holder.
That last point is where systems quietly die, organization fails when there's no upkeep routine, not because the labels were wrong. For the deeper patterns, see why home organization systems fail.
Labeling toys is a small project with a big payoff: kids who can put things away without being asked.
This guide from The Reset Aisle is part of our home organization series. For more on choosing bins that last, see our storage guides.
Frequently Asked Questions
How do you make DIY labels for toy storage?
Pick a label type, then print or write it and attach it to the bin. Most people choose printable toy storage labels, write the category name in large text, add a picture if kids can't read yet, and laminate or cover the label with clear tape. Attach with peel-and-stick adhesive, a clip-on holder, or a hole-punched tag tied to a basket handle. Label the front of each bin at a child's eye level so kids can find and return toys without help.
Are picture labels or word labels better for toy bins?
Picture labels win for kids under five or anyone who can't read yet, because a photo of blocks or a stuffed bear is recognized instantly. Word labels work well once kids are reading and for adults sorting a shared playroom. The most durable approach is a toy bin label with pictures plus a short word underneath, so the same label keeps working as a child learns to read. Older kids often prefer word-only labels with cleaner fonts.
How do you keep toy labels from peeling off?
Match the attachment method to the bin surface. Peel-and-stick labels hold on hard plastic and smooth storage cubes but peel off fabric bins, so use clip-on holders, hole-punched tags, or adhesive label pockets there. Clean and dry the surface before sticking, press firmly for 30 seconds, and avoid placing labels where hands rub constantly. Laminating paper labels or covering them with clear packing tape adds water resistance and stops corners from curling.
How can kids help make toy storage labels?
Let kids pick the pictures, choose colors, and decide which toys belong in each category. Younger children can sort toys into piles while you print and cut, and older kids can draw their own icons or write the category names. Having a hand in making the labels builds ownership, which makes cleanup more likely to stick. Keep a small basket of blank labels and markers nearby so kids can add new categories as their toys change.
